This displays the currently selected image file.
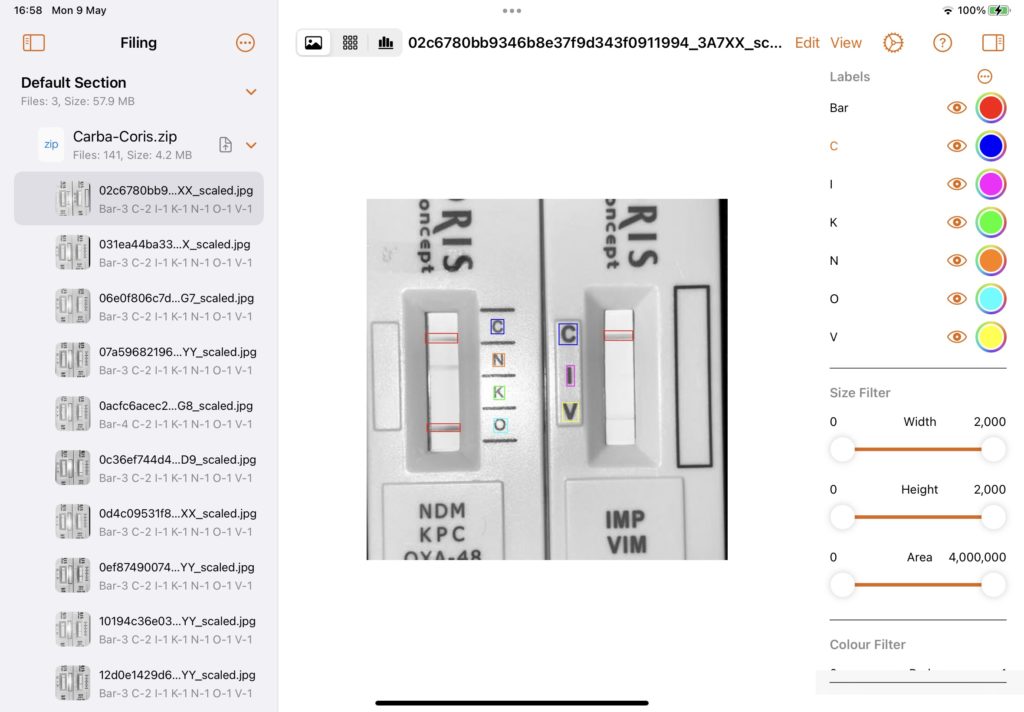
When ToolZ is configured as an object detector this view can create and edit boxes for training an object detector. The Apple Pencil is an ideal tool for creating and editing boxes. The boxes in the edit view are coloured according the colour assigned to each label. To change the colour of a label refer to the properties panel.
Depending on the aspect ratio of the image you are editing you can rotate the device so that the image fills the screen. You can also hide the filing and/or properties panels so that the image completely fills the screen.
The edit image view can be zoomed but using a pinch to zoom gesture. While zooming the image the boxes are hidden until the zoom stops.
A pan gesture moves the zoomed image around.
Creating and Manipulating Boxes #
To create box:
- Select the label for the box you wish to create
- Press and drag on the image to drag out a box.
To select a box:
- Tap in a box to select it.
The selected box displays drag handles for resizing the box.
The cross in the centre of the box can be used to move the box.
If the size of the box falls below a certain threshold then the view will zoom around that box. - Deselecting the box will zoom out again.
To delete a box:
- Tap again in the selected box to display a delete button in the top right corner.
- Tap on the delete button to delete the box.
To change a label:
- Tap to select the box
either: - Tap on the label in the properties panel to set it
or: - Tap again inside the box to display the delete button.
- Subsequence taps within the box will select the next label in the properties panel.
- Keep tapping to cycle around the labels.
This feature is provided as shortcut for selecting labels when the list of labels is relatively short and is also useful if the properties panel is hidden.
Swiping to navigate images:
- Swipe either left or right to select the next / previous image in the current section / subsection. Again, this is useful if you choose to have the filing panel closed.
Filtering displayed boxes:
- Tap on the eye button on the respective label in the properties panel to filter the displayed boxes.
Edit Menu #
- Choose the Select All menu item to select all boxes.
When any boxes are selected the Delete item is enabled. - Choose the Delete item to delete the selected boxes.
Create Boxes From Predictions
When showing predictions, (see below), this menu item is enabled and choosing it will create boxes where the model has made predictions. This can be useful when testing your model and also wishing to add further data for enhancing the model further. If the prediction is incorrect then you can select the box and change the label.
Contract Boxes To Threshold is documented here.
View Menu #
The top section of the view menu utilises various threshold filters to create segmentation and contours. Tap here for further details.
Show / Hide All Labels
- Choose this menu item as convenience to show and hide all the displayed labels. Note that the eye button for each label in the properties panel will toggle accordingly.
Show / Hide Predictions
This menu item will be greyed out unless you have imported a model and selected to use it in the current settings configuration. Tap here for further details.
- Choose this menu item to toggle the display of predictions for the current model. The predictions are shown as boxes with their label and a percentage for the prediction.
When predictions are displayed for an object detector, the menu item Create Boxes From Predictions in the Edit menu becomes enabled.
Show / Hide Overlay
The overlay allows you to place another image over that selected in the filing panel. It is highly likely that the overlay image will have transparency and as such be a PNG. In the screenshot below we have imported a PNG of a Walton-Beckett graticule which is shown as an overlay on top of an image captured from a microscope. The overlay image is associated with a settings configuration.

To set an overlay image:
- Import the PNG file into an appropriate section in the filing panel.
- Press and hold on the image to use as an overlay.
- Drag and drop the file over the main image view. This will set the overlay image into the current settings and also show the overlay.
- Tap the View menu and choose Hide Overlay to hide the overlay.
Show / Hide Histogram
The histogram displays a count of the red, green and blue channels for a colour image, or just a single channel for a greyscale image.
- Tap the View menu and choose the Show / Hide Histogram item to toggle the histogram.
A histogram of the image will be displayed. - Press and drag on the histogram view to move it around the screen.

