Tapping the gear button towards the top-right opens the Settings popover. Understanding the settings is critical to setting up ToolZ for labelling your images.
ToolZ supports multiple configurations of settings. You can switch between them depending on the type of images you are labelling. A settings configuration can be imported and exported as either a .plist or .json file. Tap here for the settings file format.
The left column lists the settings configurations. A default Untitled configuration is created by default. Tap on the Untitled label to edit its title. The tick to the right indicates that this is the current configuration. To switch configurations; tap the configuration to make active then tap the Apply button.

General #
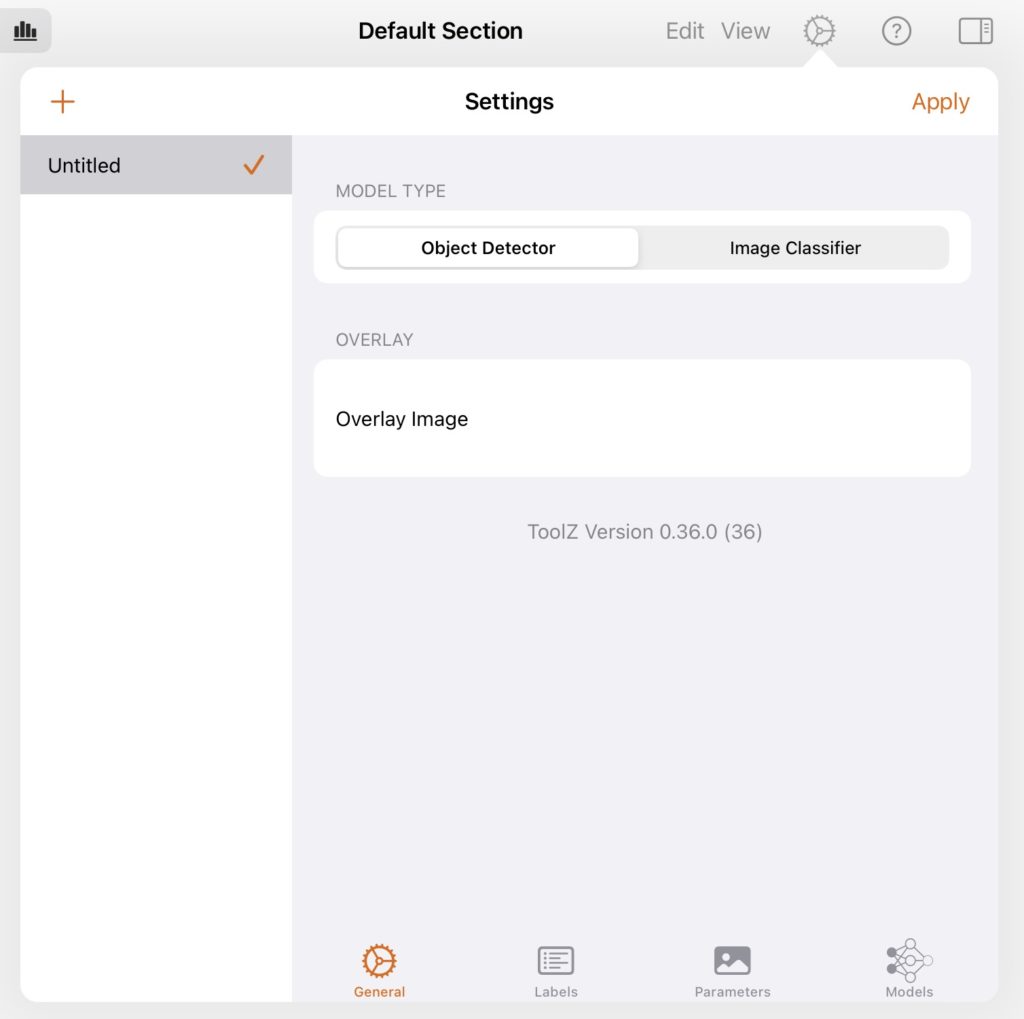
Model Type: Choose between either an Object Detector or an Image Classifier. This changes the behaviour of ToolZ when labelling images.
Image Classifier
This is the simplest setup as you are only assigning a label to a whole image. As you select images in the filing panel the properties panel will update to show the image’s classification. The current classification’s label will be displayed under the file’s name in the filing panel and the label will show as the orange accent colour in the properties panel. Tap on one of the labels in the properties panel to assign/re-assign another label.
Object Detector
When configured as an object detector the Edit Image View will create, display and edit boxes for labelling the selected image. A count of the boxes and their associated labels are shown under the name of the image file in the filing panel.
Overlay Image: This displays the overlay image for a given configuration. Tap here for details on setting the overlay image.

Labels #

Labels are placed into Label Groups. When classifying images you select a label group with which to work. A label can appear in more than one label group. Above the Fiber configuration is selected; this has one label group titled Fibers which is checked to indicate it is part of the configuration. The Fibers group is also selected and all the labels are checked to indicate that these are part of the selected group.
To create a label group:
- Tap the + button at the top of the Label Groups column.
A new group will be created as Untitled. - Tap on the group title to rename it.
- To add the group the the currently selected configuration, tap the circle for the group to add it to the configuration.
To create a label:
- Tap the + button at the top of the Labels column.
A new label will be created as Untitled. - Tap on the label’s title to set its attributes.
- Edit the label’s title; this is only used for display within ToolZ.
- The textfield to the right of the title is for the label’s Class Index. This is optional but must be entered as an integer. The class index does not need to be unique within ToolZ but it is highly likely you will want to make it unique within a configuration.
- Edit the textfield labelled Classification. This is a short code used by ToolZ to uniquely identify the label. This must be unique within ToolZ.
- To add the label to a label group; ensure the label group is selected then tap the circle for the label to add it to the selected group.
To delete a label group or label:
- Swipe to the left on the group / label.

Parameters #

This tab sets the parameters that are used for filtering images based on the size of boxes and the filter colour model.
Filter Sizes: These are the minimum and maximum values that are used for the range sliders when filtering and not the minimum and maximum values that are actually used for the filter.
Filter Colour Model: This is the colour model used when filtering. Tap here for further details on filtering.

Models #
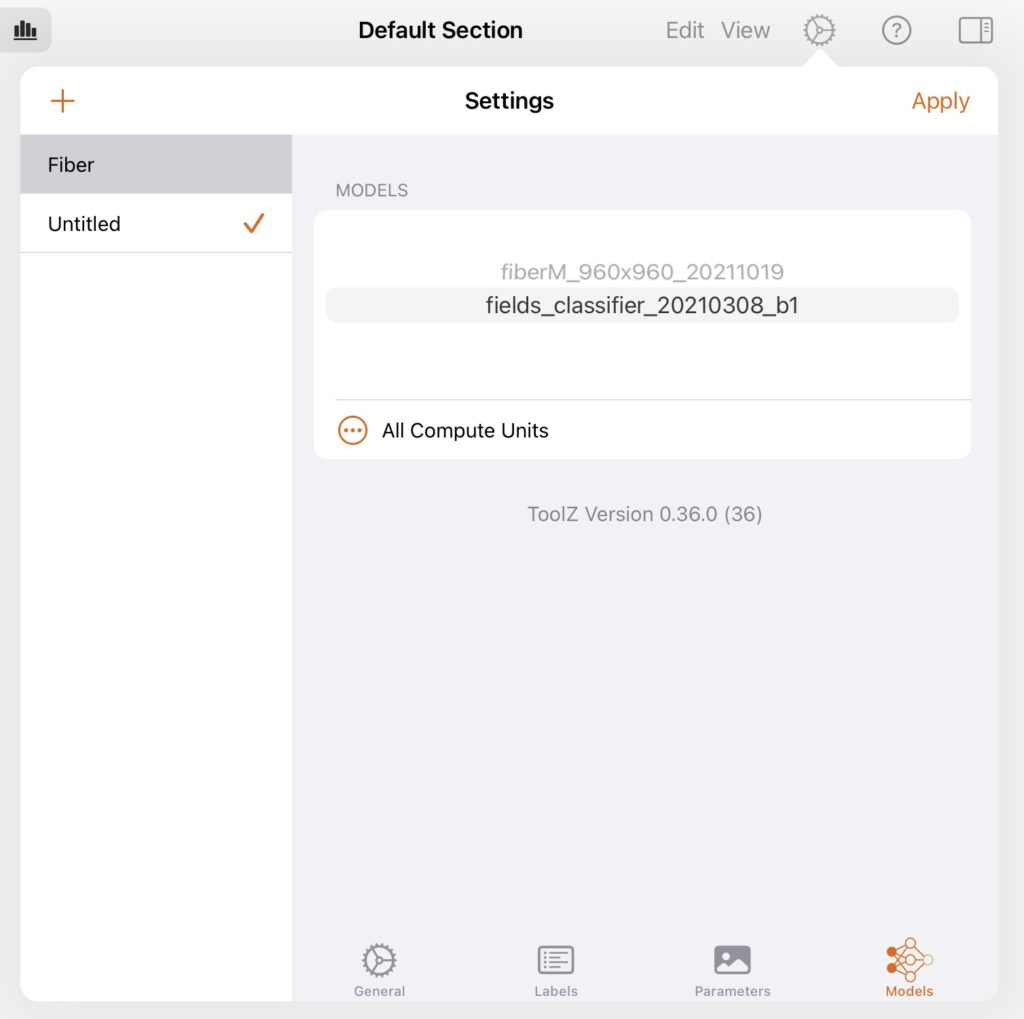
This tab sets a model which has been previously imported into the filing panel. The model can be used for predicting either image classifications or object detection.
Models: Use the picker to select a model for the selected configuration. This will enable predictions to be shown when an image is selected. Further information on predictions is detailed here…

Tap on the ellipsis button to open a popover menu to select one of three compute options when predicting images.
